Your First App
The Goal
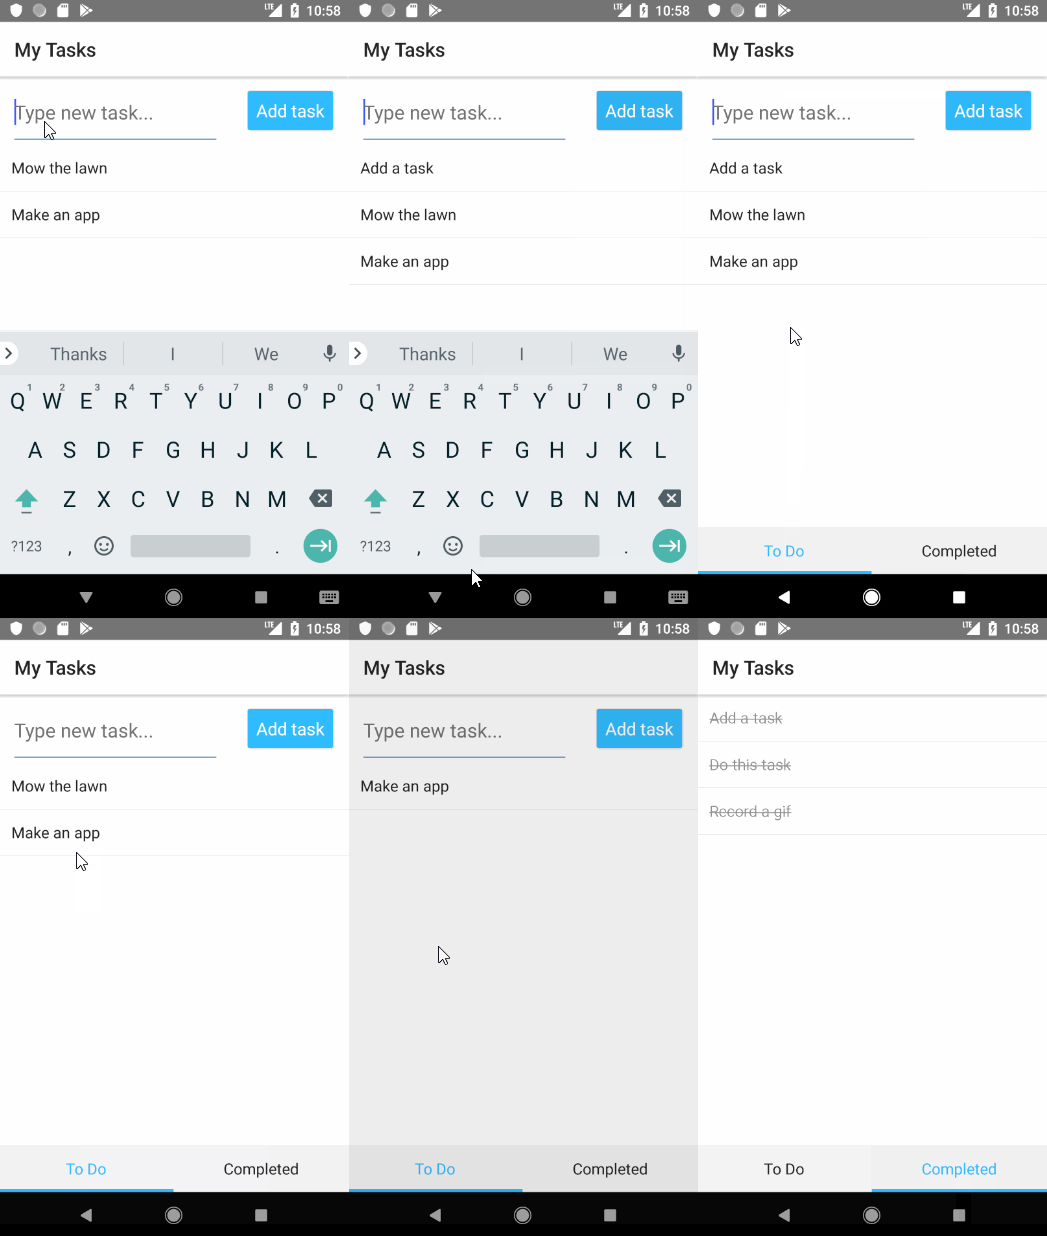
Sometimes it can be easier to learn something if you have a goal to work towards. In this section we will build a Todo app with Svelte Native. It will have the following functionality:
- Basic design
- Two-tab layout
- One tab shows active tasks and lets you add new tasks
- Second tab lists completed tasks
- Basic functionality
- Add tasks: Users can add tasks as text
- View tasks: Newly added tasks are listed as active and can be tapped
- Complete tasks: Tapping an active task shows an action dialog with options
- Delete tasks: Tapping an active or completed task shows an action dialog with options
- Advanced design
- Input and button for adding tasks are styled
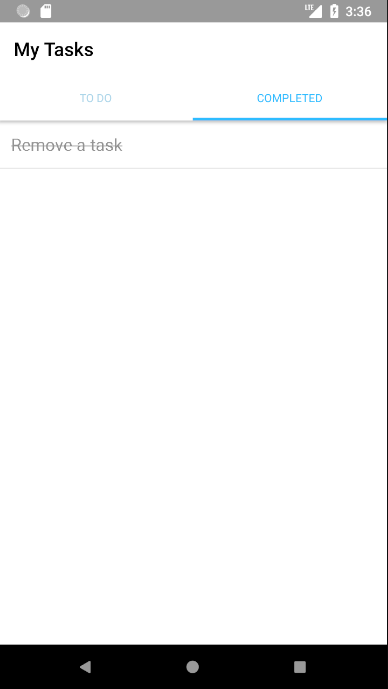
- Completed tasks are styled
Prerequisites
Before you start, please ensure you have at least followed the Quick Start Guide and can get an application to run on your mobile device or emulator.
This guide assumes a existing familiarity with the Svelte framework. Run through Svelte's excellent tutorial to get up to speed.
Basic Design
We will start our from a fresh app template:
$ ns create todoapp --svelte
$ cd todoapp
$ npm install
Set the contents of components/Home.svelte to:
<page>
		<actionBar title="My Tasks" />

		<tabView>
				<tabViewItem title="To Do">
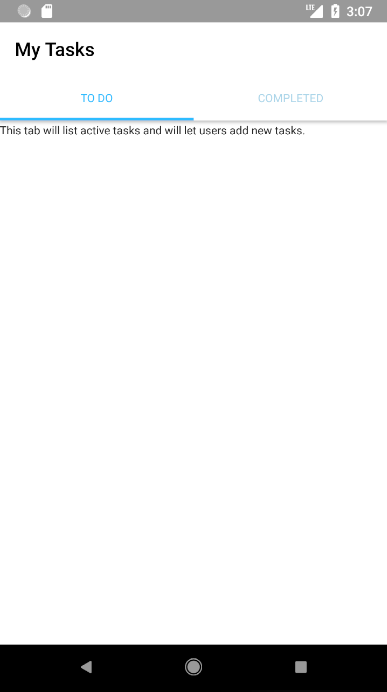
						<label textWrap="true">This tab will list active tasks and will let users add new tasks.</label>
				</tabViewItem>
				<tabViewItem title="Completed">
						<label textWrap="true">This tab will list completed tasks for tracking.</label>
				</tabViewItem>
		</tabView>
</page>
NOTE Notice that all tags start with a lower case letter. This is different to other NativeScript implementations. The lower case letter lets the Svelte compiler know that these are NativeScript views and not Svelte components. Think of
<page>and<actionBar>as just another set of application building blocks like<ul>and<div>.
What's all that then?
The <page> element is the top-level user interface element of every Svelte-Native app. All other user interface elements are nested within.
The <actionBar> element shows an action bar for the <page>. A <page> cannot contain more than one <actionBar>.
Typically, after the <actionBar>, you will have navigation components (such as a drawer or a tab view) or layout components. These elements control the layout of your app and let you determine how to place other user interface elements inside.
The <label> tags have been used differently. One has the text= attribute, while the other has the text between the opening and closing tags. Plain text between tags will be automatically assigned to the text attribute of the tag.
Progress So Far
Basic Functionality: Add Tasks
We have our basic design, lets allow the user to add some tasks.
Replace the contents of the first <tabViewItem> with:
<gridLayout columns="*,120" rows="70,*">
		<!-- Configures the text field and ensures that pressing Return on the keyboard
				produces the same result as tapping the button. -->
		<textField col="0" row="0" bind:text="{textFieldValue}" hint="Type new task..." editable="true"
				on:returnPress="{onButtonTap}" />
		<button col="1" row="0" text="Add task" on:tap="{onButtonTap}" />

		<listView items="{todos}" on:itemTap="{onItemTap}" row="1" colSpan="2">
				<Template let:item>
						<label text="{item.name}" textWrap="true" />
				</Template>
		</listView>
</gridLayout>
and to the bottom of the file add a script tag:
<script>
		import { Template } from 'svelte-native/components'

		let todos = []
		let textFieldValue = ""

		function onItemTap(args) {
				console.log(`Item ${todos[args.index].name} at index: ${args.index} was tapped`);
		}

		function onButtonTap() {
			if (textFieldValue === "") return; // Prevents users from entering an empty string.
			console.log("New task added: " + textFieldValue + "."); // Logs the newly added task in the console for debugging.
			todos = [{ name: textFieldValue }, ...todos] // Adds tasks in the ToDo array. Newly added tasks are immediately shown on the screen.
			textFieldValue = ""; // Clears the text field so that users can start adding new tasks immediately.
		}
</script>
What did we just do?
To allow the user to enter a todo item, we need to capture the name of the task. We did this by adding a <textField>. A <button> was added to submit the task and a <listView> to display the task.
Since this functionality required adding 3 elements to the tabview, we use layouts to tell NativeScript where to place each item. Here we used a <gridLayout> to define 2 columns and 2 rows where the second column is 120dp and the first column takes all remaining space(*,120), and the first row is 70dp while the second takes the rest (70,*). We place the <textField> in the first row and column, the <button> in the first row second column (which is fixed at 120x70) and the <listView> in the second row spanning 2 columns (colSpan=2).
The <listView> contains a <Template> which is a Svelte component used to render each item. The template component needs to be imported just like all Svelte components.
When onButtonTap callback is fired, the code we added to the script element, will build a new todos array including the added item, and clear the text field. The onItemTap callback will just log which list item and index was tapped using console.log (which works fine in NativeScript).
NOTE
<listView>will look for the first<Template>component in its children. The template component acts similar to a slot and will render its content for each item. This is exposed to the content asitemvia thelet:itemon the template element.
Progress So Far
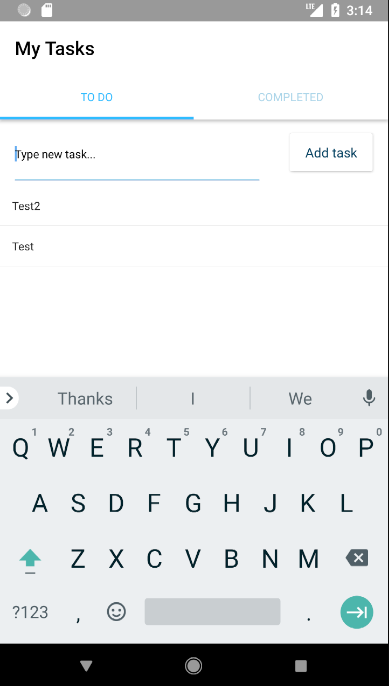
As you can see, the default styling provided by Nativescript gives you a great starting point
Basic functionality: Complete/Delete Tasks
Nobody likes a todo list that only gets longer. We should add the ability to mark a task as complete, or to remove it if we added it by accident.
Near the top of the script tag after the let todos=[], add an array for our completed tasks and some helper functions to help us manage our lists.
		let dones=[] //completed items go here
		const removeFromList = (list, item) => list.filter(t => t !== item);
		const addToList = (list, item) => [item, ...list]
Then replace our onItemTap function with this new one:
	async function onItemTap(args) {
		let result = await action("What do you want to do with this task?", "Cancel", [
				"Mark completed",
				"Delete forever"
		]);

		console.log(result); // Logs the selected option for debugging.
		let item = todos[args.index]
		switch (result) {
				case "Mark completed":
						dones = addToList(dones, item) // Places the tapped active task at the top of the completed tasks.
						todos = removeFromList(todos, item) // Removes the tapped active task.
						break;
				case "Delete forever":
						todos = removeFromList(todos, item) // Removes the tapped active task.
						break;
				case "Cancel" || undefined: // Dismisses the dialog
						break;
		}
	}
Breaking it down
Native script comes with a global dialogs module that allows us to show small modal windows to obtain data from a user. We use the global action method in onItemTap. When the user selects "Mark completed" we find the item using the args.index we get from the event, and remove the item from the todos. We then add the item to our new dones array. The "Delete forever" option just removes the item from the todos.
NOTE Notice that we reassign the
donesandtodosvariables during delete or complete operations. Svelte's reactive variables work at the top level and cannot detect changes in an array. By assigning a new value todonesandtodoswe are ensuring that any template that depends on those variables will be updated.
Progress So Far
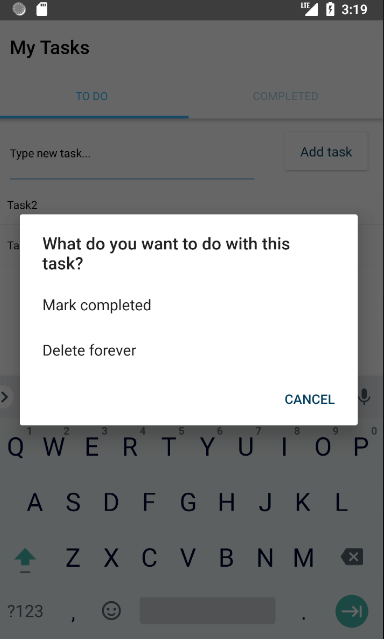
Basic functionality: The Completed Tab
To get that sense of satisfaction from completing an item on your todo list, it would be good to be able to see the item on the completed tab. In this section we will add a listView to display the items and allow you to delete them or restore them to the todos using an action.
First add the listView below to the second tabViewItem replacing the label
<listView items="{dones}" on:itemTap="{onDoneTap}">
		<Template let:item>
				<label text="{item.name}" textWrap="true" />
		</Template>
</listView>
Then add the code for the onDoneTap to the script block:
async function onDoneTap(args) {
	let result = await action("What do you want to do with this task?", "Cancel", [
			"Mark To Do",
			"Delete forever"
	]);

	console.log(result); // Logs the selected option for debugging.
	let item = dones[args.index]
	switch (result) {
			case "Mark To Do":
					todos = addToList(todos, item) // Places the tapped active task at the top of the completed tasks.
					dones = removeFromList(dones, item) // Removes the tapped active task.
					break;
			case "Delete forever":
					dones = removeFromList(dones, item) // Removes the tapped active task.
					break;
			case "Cancel" || undefined: // Dismisses the dialog
					break;
	}
}
What we just did
To display our done items we added the listView to the "completed" tabViewItem and bound it to the dones variable we defined in last step.
We added an event handler to handle taps on the "completed" items. This handler is very similar to the handler added in the last section, except that it works on the dones array and not the todos.
Advanced design: Styled input
The basic functionality of the todo app is complete. But it could do with a little more styling. In this section we will style the text box and button elements.
The NativeScript core theme does a great job of default styling our application but we want to increase the importance of our button. We can do this by applying the -primary class to the button.
<button col="1" row="0" text="Add task" on:tap="{onButtonTap}" class="-primary" />Our input text should also be more emphasised. At the bottom of Home.svelte add the following style tag:
<style>
	textField {
			font-size: 20;
	}
</style>
A style tag in a native application!?
When you work with NativeScript and Svelte, you can use application-wide CSS, scoped CSS, or inline CSS to style your app. Application-wide CSS is applied first and is handled in app.css in the root of your project. This tutorial does not explore application-wide CSS. See also: Styling.
Scoped CSS is applied to the current component only and is handled in each component's <style> block. This tutorial relies almost exclusively on scoped CSS and inline CSS. See also: Scoped Styles.
With type selectors, you can select a UI component and apply styling to it. To select a type, use the component name as provided in the code. For example, to select the button, use button {.
Progress So Far
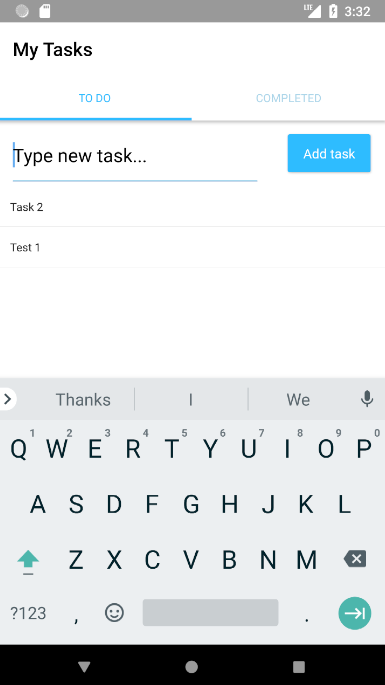
Advanced design: Styled Lists
Lets make our completed items faded and crossed out.
To the label in the listView for the dones add class="todo-item-completed"
<label text="{item.name}" class="todo-item-completed" textWrap="true" />Add the following CSS rules to the style tag
label {
				font-size: 18;
}

.todo-item-completed {
	color: #939393;
	text-decoration: line-through;
}
I see what you did there
In NativeScript you aren't restricted to just using element names as CSS selectors. We added some classes to the labels and applied CSS rules to those classes.
Our Finished Product

